
We don’t use our front porch much. When we moved here from New York two years ago, I set an old wooden rocking chair out there to make it look welcoming. The chair is a cherished relic of a flea market visit, one of the last outings we had with a good friend who has since died of cancer. I did not know when I put the rocking chair on the porch that Georgia’s humidity is not kind to unpainted wooden things. When I discovered recently that the chair was no longer fit to sit upon, I wondered what to do with it. I couldn’t toss it out for sentimental reasons. Then I spied an old chair at a booth at the Marietta Farmer’s Market that had been made into a planter. Perfect! I determined my old rocker would be reincarnated as a container garden. I mentioned this plan to a master gardener friend who said she has wanted to do something similar with an old chair or hers. I thought I would share how I created mine so that perhaps you might be inspired to give an old chair of yours a second life in the garden too.
I started with what my Momma calls chicken wire, although what I purchased at the hardware store was labeled, “galvanized hardware cloth”. I unwound the five-foot long roll and shaped it into a rectangle roughly the size of the chair bottom. This would become the sides of the wire basket I intended to construct. Since the chicken wire was two feet wide, I needed to cut it down to a size that would make it even with the arms of the chair. The piece I cut away could be used for the bottom of the wire container that would ultimately rest on the seat of the chair between the two arms.
 I snipped the chicken wire to size using a pair of needle-nose pliers with wire snip feature in the crotch of the pliers. This is a delicate process as the protruding pieces of wire can easily scratch your arms if you aren’t patient and careful. Despite the risk of impalement, it was useful to leave the protruding pieces of snipped wire as long as possible, as it made it easier to twist them around the seams when forming the basket. The chicken wire has two smooth edges before you snip it. If you position the snipped edges on the bottom and side where your seams are and leave the finished smooth edge on the top, there’s less chance of snagging your arms when you go to install the plant material.
As I fashioned my wire basket I set it into the chair occasionally to check the fit. I wanted it to fill up the chair as completely as possible, leaving just a bit of room for the green moss I planned to attach to the outside of the basket to conceal the wire.
Once the wire basket was finished, I put it in the chair and began to line it with coconut grass. Autumn Hill Nursery sells this for a dollar a foot. I bought one square yard. You can easily tear the coconut grass with your hands. I placed extra padding at the corners and seams.
Then I began decorating the outside of my container with green moss. Garden Ridge sells this for $2.99 a bag. I used four bags. In some areas, I secured large sections of moss with green florist wire and then tucked a bit of moss around the wire to conceal it. In other areas I used to those multifunctional needle-nose pliers to poke the moss into the half-inch square openings in the chicken wire.
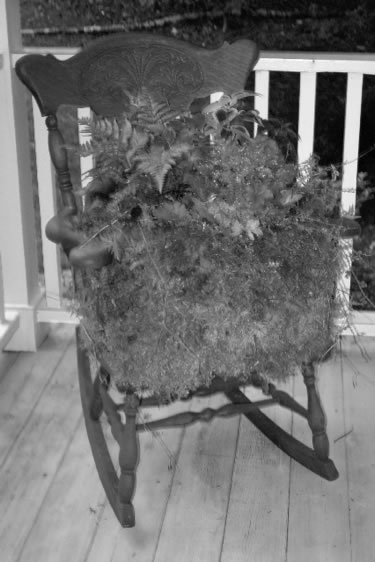
Next, I filled the container with potting medium and began adding my planting materials. You may want to move the chair to its intended location before adding the potting soil as it can be quite heavy to lift once the plants are in and watered. Since my chair was going back to the porch, I chose plants that do well in the shade. I used a color palate of rust and chartreuse picking as my plant materials an autumn fern, a Geranium ‘Brookside’, a couple of selaginellas (peacock fern), a Heucherella, a Heuchera ‘Amber Waves’ and some coleus. I hope your chair turns out as delightful as mine did.